How to clean install Windows 10/11 (guide)
CyberShack reader Tony P wrote to us. “I foolishly opened a phishing email, and My Windows 10 laptop started acting funny (as in strange, not ha, ha). Nothing I do seems to remove it, and mates have said I have to clean install windows to fix it.”
Well, Tony, I presume you have tried the free Malwarebytes (if that won’t remove the malware, nothing will), so here is our guide. But a few suggestions first.
- Backup (regardless of which install option you chose)
- Try Windows Troubleshooter and Recovery Options, especially the ‘Reset PC’ option that keeps your personal files and data. Although if Malwarebytes doesn’t work, this option probably won’t either.
- Then try ‘Windows Advanced Startup’ to install a fresh copy from the cloud, but you will need to reinstall apps and restore data.
If the above works – great and it will save you a couple of hundred bucks for a techspert to do it. If it does not then it is off to the techsperts.
How to clean install Windows
As you can tell from the preamble, this is probably the last resort because a clean install of Windows 10 or 11 means losing all your apps, data and settings – a clean start. But it is the only way to ensure that you eliminate any damage to the system from misbehaving apps or viruses/malware. One caveat – some virus/malware hides in the BIOS and the Boot track. If a clean install does not work, it is off to the techspert.
You also need to do a clean install to upgrade/replace the hard disk or SSD. Sure, you can clone your existing installation (more later), but any defects in the old system will be in the new one.

Rule 1 – Backup – twice even
Windows user data is easy to backup. The main folders are Documents, Pictures, Music, and Videos. You can upload these folders to the Microsoft OneDrive cloud (free from the Microsoft Store). Depending on the size (OneDrive is 15GB maximum) and internet speed, that may take a long time. Or you can back up using cut and paste to a flash drive at around 30MBps – 1GB under a minute.
Windows also has backup options, including creating a system image (Recovery Drive) to an external drive. This is fine if you don’t have a virus/malware.
We recommend both – as carpenters say, “Measure twice, cut once”.
Next, go to your Internet Browser (Firefox, Edge, Chrome) and export your Bookmarks (usually under Manage Bookmarks) to an HTML file so you can restore them.
Email: If you use Outlook or Gmail, all that data is in the cloud, so it is easy to reinstall.
Finally, ensure that you have all your log-ins and passwords written down. At the very least:
- Microsoft Account for Windows and Outlook
- Google Account (if you use Gmail)
- Any other apps or programs that you will reinstall.
Most programs will reinstall and activate with your log-in and password, and some require re-entering the activation key.
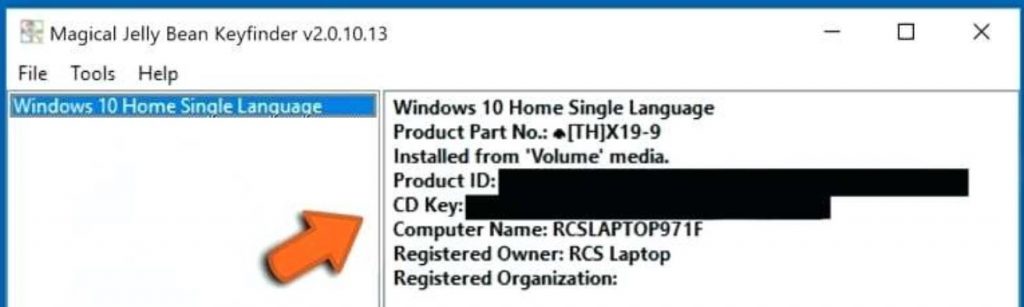
Find your activation key
To find your Windows version and Windows key, download Magical Jelly Bean Finder (there is a Mac version too) and use it to find the Windows CD Key – it looks like this DA246-4VFG4-RBS8C-YRZYV-YY49C. Write it down and also put a copy in a plain text file. You may need this key to activate Windows again (Control Panel, System, Activate Windows) if your machine does not automatically do so.
Get the Windows ISO
You will need a USB drive of at least 8GB – 16GB is better. The links below are to Microsoft’s official download site – do not use a third-party site. You need to select Windows 10 (what you are replacing) and 64-bit (x64)
It downloads a tool that creates an installation flash drive. You need to know which version of Windows you have as the install process may not identify that from the PC or the license key.
You may need to change the boot order from disk to flash drive.
On Windows 10, go to Settings, Updates and Security, Recovery, Troubleshoot, Advanced Options, UEFI Firmware Settings, Reset. That opens the BIOS. Select Configure Boot Options, Change Boot order and select Flash Drive first.
Those who understand this won’t have any issues adjusting the BIOS and may bypass the steps above by pressing the relevant Function key at BOOT (Esc, F1 or F11). You can search how to access the BIOS for your laptop brand and model on the internet.
Clean Install Windows
Insert the flash drive and perform a power-on boot. If it boots into your old Windows, your BIOS may need to be changed to boot from the flash drive first (see above).
If it boots to the install screen, follow the screen prompts, enter your Microsoft Account and password and it should soon come up with Windows.
One caveat – if the virus/malware has infected the disk boot track, you should select the Custom Install option (Advanced) to delete all disk partitions and reinstall/format. I do this as standard procedure for all clean installs.
It will eventually get to the Windows’ Out of the Box’ state where you select:
- keyboard type (US – not English)
- Country
- Windows
spywarePrivacy options. I say no to all - Enter your Microsoft account. Windows 10 still allows you to install as a local account (make sure you don’t connect to the internet first), but Windows 11 mandates you enter your Microsoft Account
- Create a PIN
- Customise your experience – skip
- Use your Android phone – skip
- Back up files to OneDrive – select only save files to this PC
- Microsoft 365 free trial – Decline
- Let Cortana
spyhelp you – Not Now - The Windows home screen will open
- Reinstate your backups – that is it. Note that Apps with a log-in and password will need to be activated again
Over time Windows Update should find new drivers and patches. You can go to the Brand/model support site and download these if you are concerned. If you have an Intel-based PC, you can install Intel Driver and Support Assistant for all the Intel bits (recommended)
New SSD or Hard disk
A new SSD could give up to 6X disk performance improvement over a SATA3 hard disk.
If the reason was to upgrade/replace your SSD or hard disk, you must follow all the backup and ISO instructions.
You can then clean install Windows if you know how to remove the old drive or SSD and insert a new one.
Windows may think you have a new PC (rare) and ask for the activation key. It is caused by upgrading SSD, ram and/or a video card simultaneously. Do these as separate steps after Windows is activated.
Or Clone it
We repeat – if there is anything wrong with the existing install, it will be in the clone install.
Clone means making a mirror image of the existing drive to the new one. You can’t just disk copy – you need cloning software (like Acronis) that generally comes with the new SSD or hard disk.
If you are cloning:
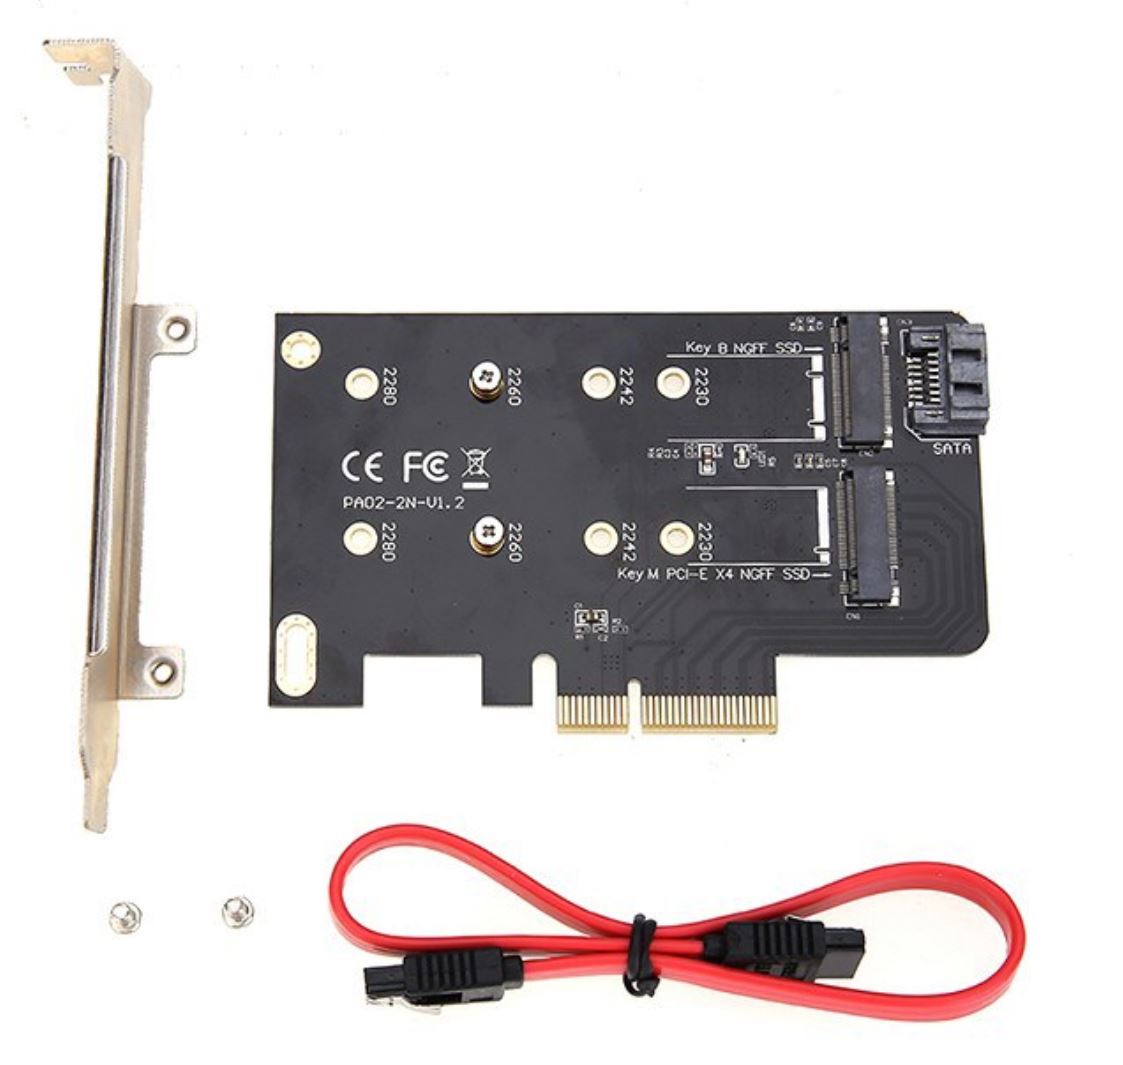
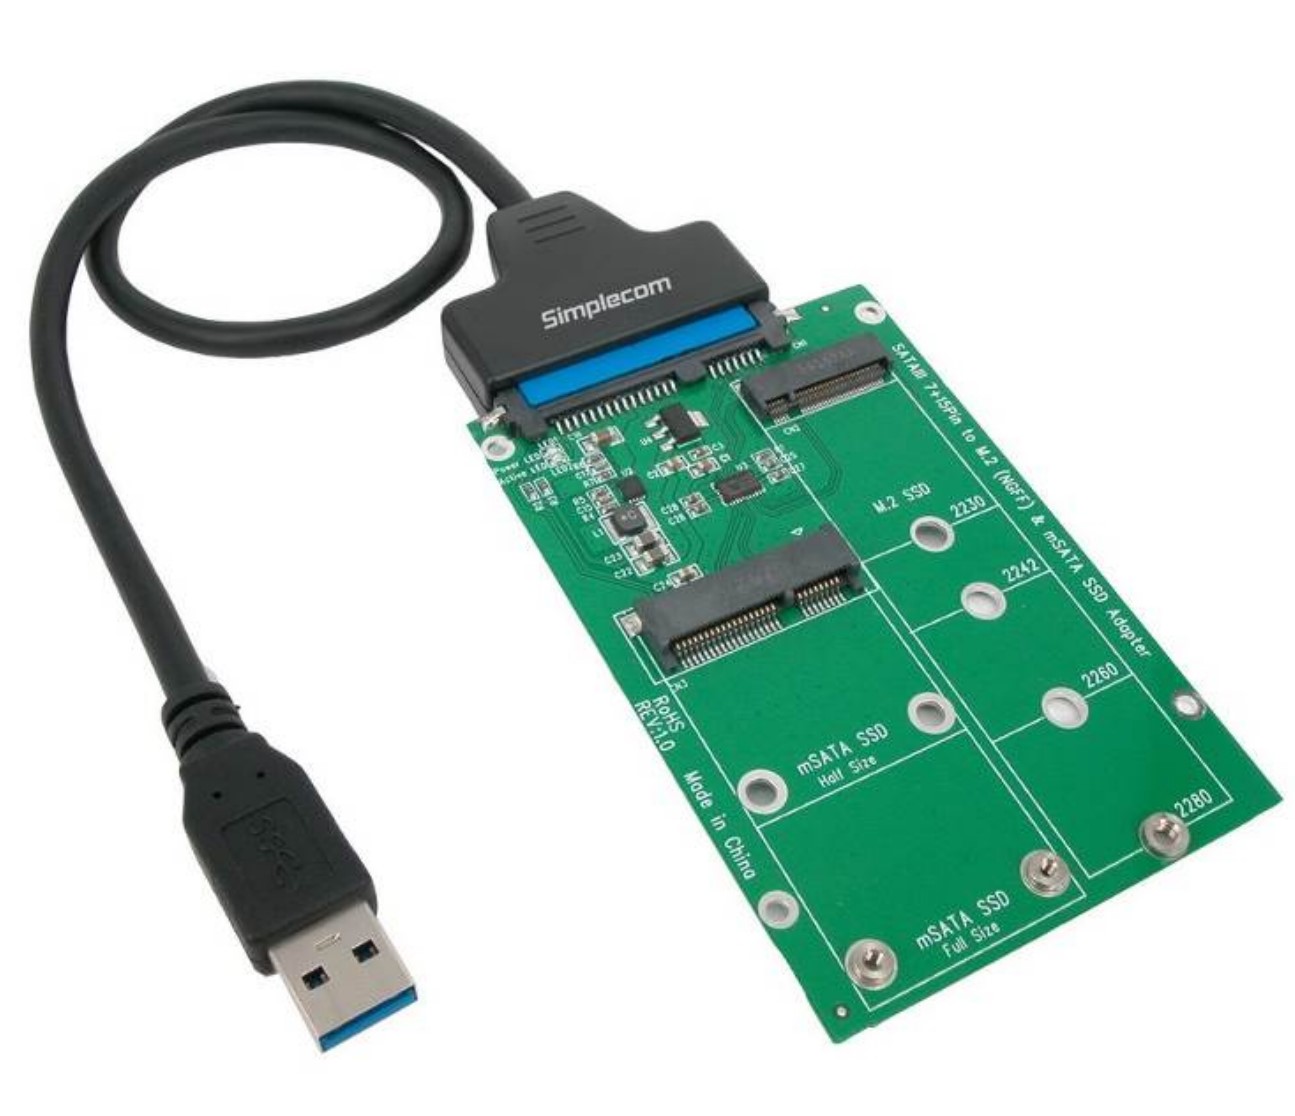
- Hard disk to an SSD, you need a spare M2.2280 slot
- SD to an SSD, you need an additional M2.2280 slot
If you have a PC, you can buy a two-slot M2.2280 PCIe card. We don’t recommend cloning over USB-A 3.0 because it is very slow, but there is a USB SATA and M2 adapter that we have had success with.
CyberShack’s view – clean install Windows is not for the faint-hearted
OK, I have done it hundreds of times but chances you have not. It may be easier to go to your local PC repairer, and they will usually do it for under $200 plus any new SSD/HDD.
On the plus side, a clean instal of windows will also reset the system, which means lower memory use, faster performance, and less registry bloat.
Or a clean install (Factor Reset) is best if you are selling or retiring the PC and don’t want any personal data exposed.
We recommend that you read our guides, Remove Windows Bloatware and get back heaps of memory and CPU resources and Five free Windows programs that will save your bacon. These are invaluable tips for an efficient Windows PC.
Brought to you by CyberShack.com.au